Nature's Composters
How to Make Worm Compost in Your Home
by Richard Probert

Photo © Marilyn Firth |
A worm composting unit is a system with five elements: a physical structure, bedding, redworms, food, and maintenance procedures. Physical structure refers to a box or bin. This can be a self-made wooden box, or a plastic box bought from a retailer.
The usual box size is one foot high, two feet wide and three feet long. Be sure to have small air holes in the bottom for aeration. A black plastic sheet with air holes is also needed to cover the bedding, since worms are light-sensitive.
For apartment dwellers, a plastic box might be the answer. This can be purchased from a worm supplier or retailer, which you can find in the classified section of popular nature magazines. My plastic box is 12 by 12 by 18 inches with an aerated lid. A plastic box will last longer than a wooden box, which might be a consideration for some people. You can also improvise by using a plastic storage container, with holes drilled in the sides, near the bottom.
This box can be kept in the basement, kitchen, a spare room, or on the patio. Outdoor composting is possible from spring through fall. In winter, however, a covering of vegetable matter and snow is necessary to keep the worms from freezing. This makes it difficult to add fresh material, so winter composting is best done indoors.
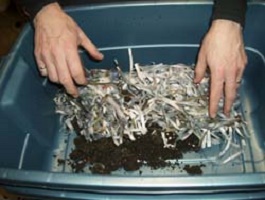
After you have built or bought a box, you must prepare the bedding. The best bedding is a mixture of shredded newspapers and corrugated cardboard; grass clippings; leaf mold; if available, some well-rotted pig, chicken and cow manure; and small amounts of soil. Never use human wastes in the bedding, since this can lead to disease for both worms and people. A specially prepared dry bedding can also be purchased from worm retailers.
As for worms, these are found in gardens under rotting vegetation, and under manure piles on farms. The little redworms are surface feeders, turning waste materials into nutrient-rich vermicompost. Worms can also be purchased from retailers.
If you buy worms, they will be sent by priority post or overnight courier. Immediately upon receiving the worms, pick out the dead ones. Add water to the prepared bedding, and place the worms on top. In general, the dry bedding should be moistened with a 3:1 ratio of bedding to water.
All worms require oxygen, and produce carbon dioxide, just like humans. Redworms also use microorganisms in the bedding, which help them break down, digest, and turn waste material into rich vermicompost.
Temperatures below 50 degrees Fahrenheit (ten degrees Celsius), or above 84 degrees F (28 degrees C) are harmful to redworms. Never place your redworms in the direct summer sun, and never leave them out in the freezing cold.
While some fluctuation in temperature is to be expected, you should strive for a temperature range of 55 to 75 F, or 13 or 25 C. These are the best temperatures for worm health, growth, and feeding.
So now you have a box with bedding and worms. What then do you feed these little redworms?
Redworms will consume almost any vegetable or fruit waste. Apples and apple peelings, baked beans, banana peelings, biscuits, bread, cheese, lettuce, cabbage, celery, carrots, beans, egg shells, cucumbers, pineapple, potatoes, pizza crusts, other leftover vegetables, and oatmeal are all good food sources for redworms. Just be sure to chop everything into small pieces.
Note that meats are not included on this list. While redworms will eat meat, this can lead to an odour problem, which might attract mice and rats.
Potato peelings should be used sparingly, since the cellulose in the peels is often difficult for worms to break down. Anything too acidic, such as orange or lemon peels, should also be used sparingly. And never feed worms fat or oils.
As for feeding, once or twice a week will be sufficient. I keep all kitchen wastes in an old ice cream bucket. There are two people in my household, so it takes about a week for the bucket to fill with kitchen wastes. A larger family would likely accumulate greater amounts of waste. About five to ten pounds per week is normal. This is buried in the bedding, with the second batch of wastes buried next to the first, and so on.
After 8 to 10 weeks, your bedding will become black, which indicates that the worms have turned the available wastes into vermicompost. Now is the time to change the bedding. I change the worm bedding every three months on average – sometimes less, sometimes more. I keep records of the dates I feed my worms. This helps me remember when to feed the worms, and when to change the bedding.
To change the bedding, place a piece of plastic on the ground or floor and turn the worm bin upside down on the plastic. Then put the vermicompost into six or eight small piles in direct sunlight, or under a bright light. The worms, being light-sensitive, will go to the bottom of the pile. Simply scoop the vermicompost and put it into a container. Then, pick up the worms and place them onto the newly prepared bedding.
Two common problems with worm composting are odour and moisture buildup. If the bedding smells and it shouldn't – this indicates a soil balance problem which can be corrected by adding limestone, with less feeding. Moisture buildup indicates overfeeding. If you have moisture buildup – and this is a common problem – simply cut back on feeding, or change the bedding.
Redworms are prolific breeders with almost unlimited possibilities for expansion. In reality, however, their numbers are limited by food, space, and environmental conditions, so you will not be overrun with worms.
Richard Probert is a freelance writer and worm composter who lives in Agassiz, B.C.
|

